

How to Use Wall Putty: Steps, Drying Time and Primer Tips
Published: 04 May 2018 | Modified: 09 Apr 2026
Create Your Dream Home With Our Painting Experts
Fill the form below to book a free site evaluation by Nerolac Nxtgen painting Services expert
TABLE OF CONTENTS
Perfection is a lot of little things done right.’ - Marco Pierre White.
It is a proud moment when someone compliments the finesse and finish of your home walls. However, to attain a pristine finish on the walls of your dream abode, you must spend both time and effort planning your wall painting endeavour.
Many people believe that paint selection alone is enough for a stunning wall finish. However, the perfect walls need a touch of more than just the best paints. Wall putty is that extra effort that can land you abundant admiration for your home walls. The correct application of wall putty has a grave impact on the final results of the wall painting job. Thus, if you crave a flawless home wall painting finish, it is vital to know the right wall putty for your paint job and the best application tips.
Also read: What is wall putty?
So, to make your wall finish flawless and stunning, here is a detailed overview of wall putty, to beautify your dream abode.
-
What is Wall Putty?
In simple terms, wall putty is basically a white cement based fine powder that is created into a smooth mixture and applied to the walls before painting.
-
Benefits of Applying Wall Putty before Painting:
Smooth Surface for Painting - When applied appropriately to the walls, wall putty fills the imperfections, cracks and faults on the surface. Wall Putty form an excellent bonding to the base concrete or plastered surfaces. Therefore, when applied over exterior or interior walls of a home, application of wall putty can create a smooth undulation free surface for a beautiful paint finish.
Benefits of Applying Wall Putty before Painting
Elongates the Life of the Paint - Wall Putty has excellent adhesion and tensile strength, thus, when applied on to walls before wall painting it adds to the life of the wall paint. Moreover, wall putty reduces deterioration of walls by making it water resistant, flake resistant and abrasion resistant. Multi-purpose Application - Wall Putty can be applied to the interior as well as exterior walls. Moreover, the mixture can be used on both dry or wet, old or new walls for a fault-free surface. -
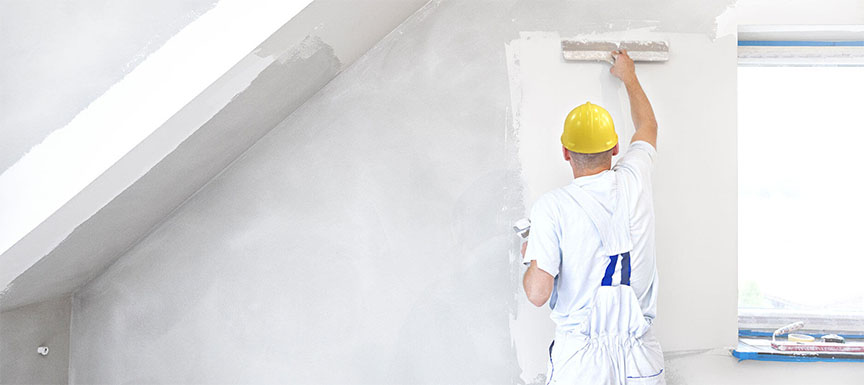
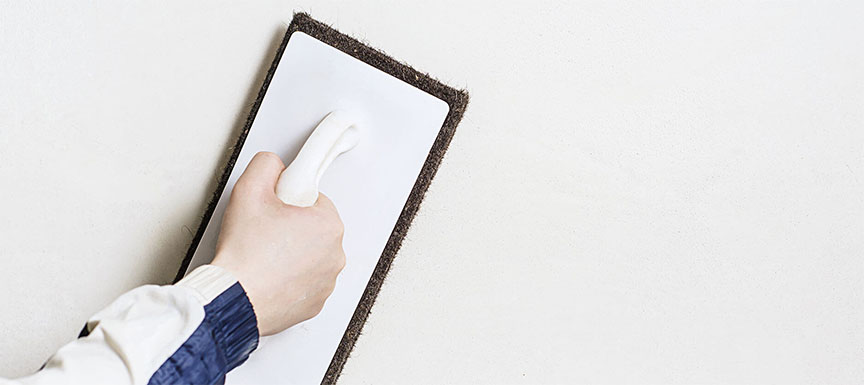
Tips for Perfect Application of Wall Putty
It is essential to know the application process of Wall Putty to achieve exceptional results. 1. To fill the imperfections of the wall, even the smallest cracks, requires you to apply wall putty after a coat of primer, following the same with a subsequent coating of wall putty. Allowing the primer to dry completely before the application is vital, for a flawless finish. 2. One or two layers of wall putty are ideal. However, the right drying time (Minimum 3-4 hrs.) prior to applying the next coating is vital, to attain the desired result. After the second coat of putty, it is desirable to leave the surface to dry, preferably overnight. 3. After sealing the wall faults with the putty mixture, smoothen the dried surface with sandpaper. 4. Ensure the surface is dust, dirt and grease free, scraping any flakes using the right tools for a flat finish. You can scrape limescale coated, or oil painted walls using a paint scraper or sandpaper. (Sand the surface with Emery Paper 180 and wipe clean after each application for a spotless finish) Wall Putty when applied with perfection, helps accentuate the finish and beauty of the wall painting. Thus, choose the right wall putty and paints to dazzle onlookers with a wall finish that is worth a second glance.
Also read: What are the types of wall putty and difference between wall putty and white cement?
Nerolac Paints, a leading paint company in India offers a wide range of wall paint colours & painting services & solutions for homes & offices.
-

Best Colour Combination For Walls To Elevate Your Home Interiors Best Colour Combination For Walls To Elevate Your Home Interiors
Intoduction:In 2025, harmonious colour schemes for individuality and…
-

Best Green Colour Combinations for Walls – Schemes & Design Ideas Best Green Colour Combinations for Walls – Schemes & Design Ideas
Introduction:Green has long been a favourite choice in home decor…
-

What Colours Match with Blue? 14 Colour Combinations with Blue for Your Home What Colours Match with Blue? 14 Colour Combinations with Blue for Your Home
Blue is a universally popular colour for décor and design; choosing a colour…
-
Recent Blogs
- Cloud Dancer Colour of the Year – Meaning, Combinations, Interior Ideas and Trends
- How To Make Yellow Colour: Tips for Perfect Wall Paint Shades & Home Décor Ideas
- How To Make White Colour: Tips for Perfect Wall Paint Shades & Home Décor Ideas
- How To Make Violet Colour: Tips for Perfect Wall Paint Shades & Home Décor Ideas
- How To Make Turquoise Colour: Tips for Perfect Wall Paint Shades & Home Décor Ideas
-
Get in Touch
Looking for something else? Drop your query and we will contact you.


Get in Touch
Looking for something else? Drop your query and we will contact you.
Latest Happenings in the Paint World
Get some inspiration from these trending articles

Cloud Dancer Colour of the Year – Meaning, Combinations, Interior Ideas and Trends

How To Make Yellow Colour: Tips for Perfect Wall Paint Shades & Home Décor Ideas

How To Make White Colour: Tips for Perfect Wall Paint Shades & Home Décor Ideas

How To Make Violet Colour: Tips for Perfect Wall Paint Shades & Home Décor Ideas

How To Make Turquoise Colour: Tips for Perfect Wall Paint Shades & Home Décor Ideas

How to Make Sky Blue Colour: Tips for Perfect Wall Paint Shades & Home Décor Ideas
Popular Post
Popular Searches
What’s Trending in Bedrooms
Explore Trending Living Room Ideas
- Living Room Colour Combination
- Modern Two Colour Combination for Living Room
- Wall Texture for Living Room
- Vastu Colours for Living Room
- Wall Texture Design for Living Room
- Living Room Paint Ideas
- Living Room Design Ideas
- Paint Colour Ideas for Living Room
- Living Room TV Wall Designs
- Green Living Room Walls
Kitchen Ideas People Love
Explore Trending Ceiling Ideas
Study Room Ideas in Demand
Explore Wall Paint Categories
Handpicked Colour Inspirations
- Accent Wall Design
- Bedroom Design Ideas
- Exterior Wall Colour Design Ideas
- Interior Wall Colour Design Ideas
- Kitchen Design Ideas
- Living Room Interior Design
- Geometric Wall Design Ideas
- Home Colour Combination Ideas
- Home Décor Ideas
- Mural Wall Paint Design Ideas
- Office Space Design Ideas
- Puja Room Design Ideas
- Texture Design Ideas
- Festival Painting Ideas
- Paint Colour Chart
- Wall Painting Designs
- Wood Wall Décor Ideas
- Mural Wall Paint Design
- Hall Design Ideas
- Gate Colour Design
- Exterior Wall Colour Design
- Door Colour Design Ideas
-
 Get in Touch
 -
Store Locator
-
 Download App
×
Get in Touch
Looking for something else? Drop your query and we will contact you.
