


How to Seal Cracks in Walls – Expert Tips for a Smooth Finish
Published: 26 Jun 2024 | Modified: 12 Nov 2026
Quick Summary
Knowing how to seal cracks in walls properly prevents moisture entry and ensures a smooth paint finish. To seal crack damage, clean and widen the crack, then fill it with a suitable crack filler for walls or flexible wall crack sealant. Hairline cracks need acrylic fillers, while wider cracks may need mesh and mortar. Learning how to seal wall cracks before painting ensures repairs stay invisible and durable.

Create Your Dream Home With Our Painting Experts
Fill the form below to book a free site evaluation by Nerolac Nxtgen painting Services expert
TABLE OF CONTENTS
Cracks in walls, floors, foundations, and other structures are common issues many homeowners eventually have to deal with. While small hairline cracks may not pose significant problems, larger cracks can signal more severe structural defects if left unaddressed.
The good news is that with the right materials and techniques, you can seal cracks around your home like a pro. With some basic tools and the step-by-step guidance in this article, anyone can achieve seamless, professional results.
How to Identify Serious Structural Issues Versus Minor Cracks?
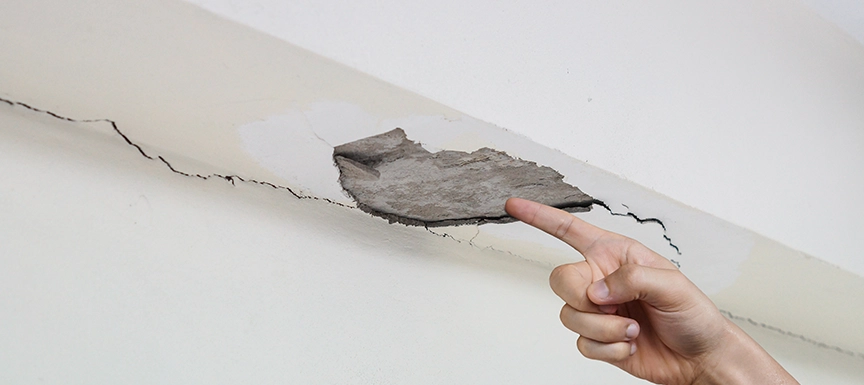
Here are some tips on how to identify serious structural issues versus minor cracks:
- Location - Cracks near corners, around doors/windows, or in multiple connected lines across surfaces likely indicate a more severe problem than isolated hairline cracks.
- Width - Cracks wider than a credit card (1/8 inch or thicker) typically mean more movement has occurred and needs addressing. Thin, widthless cracks are often minor.
- Pattern - Diagonal cracks that spread out from a point and get narrower toward the top of walls indicate a foundation problem causing shifting or settling. Jagged cracks may also signify structural problems.
- Moisture - Look for darkening, water stains, or moss growing near cracks. Water intrusion through cracks could exacerbate underlying issues.
- Growth - Monitor cracks over time. If they continue widening or new cracks form nearby, it suggests more substantial settling or movement is happening.
- Floor slant - Use a level or place a marble on the floor to check if cracking aligns with uneven settling that causes slopes or gaps at the baseboard.
Understanding Wall Cracks in Your Home
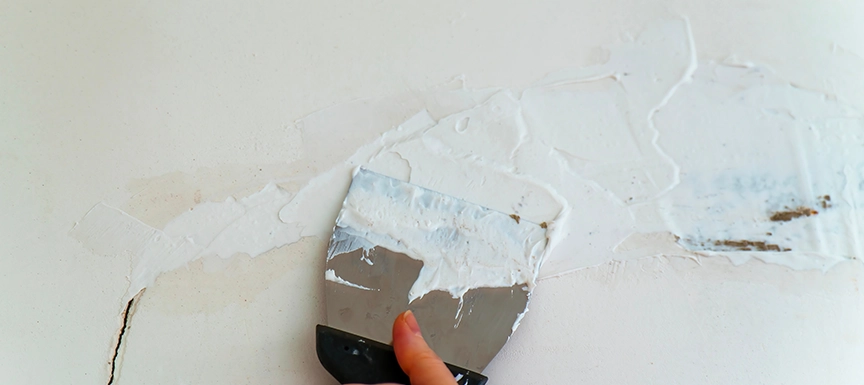
The first step is to properly identify the type of crack you're dealing with and determine its probable cause. Cracks generally fall into a few categories:
- Hairline cracks: These fragile, widthless cracks are usually caused by natural settlement or minor shifting in the structure over time. Hairline cracks are typically nothing to worry about. Nerolac Perma Crystal Seal is a top-quality solution suited for this purpose. As a cement-based formula that forms protective crystals, it helps resist dampness and prevents the unsightly blooming, known as efflorescence.
- Wide cracks: Cracks wider than a credit card signify more substantial movement. These may be caused by heavy settling, foundation issues, water intrusion, or flooding damage. Wider cracks require more extensive filling.
- Diagonal cracks: If cracks form diagonally across walls (usually wider at the top and narrow as they reach the floor), this pattern indicates foundation issues, causing the structure to spread apart. Diagonal cracks should be professionally evaluated.
- Irregular cracks: Jagged, crooked cracks that zig-zag could signal foundation problems like uneven settling, sinking, or bowing. Again, professional guidance may be needed.
Pay attention to crack locations as well. Cracks near doors/windows, around corners or in multiple connected lines mean larger underlying structural problems.
Tools and Materials You'll Need for Sealing Cracks
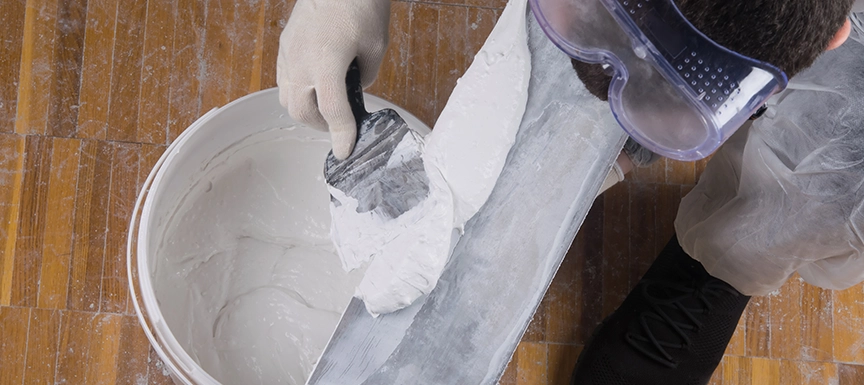
Beyond the actual foaming crack filler, you'll need a few basic tools:
- Putty knife or trowel for spreading filler
- Flexible putty knife for smoothing filler in tight areas
- Clean rags for surface preparation
- Painter's tape for creating clean edges (optional)
- Protective gloves, respirator for toxic fillers
- Hammer and cold chisel to widen cracks (if needed)
Also Read: How to Permanently Repair cracks in Walls Before The Rainy Season?
Step-by-Step Guide to Sealing Cracks
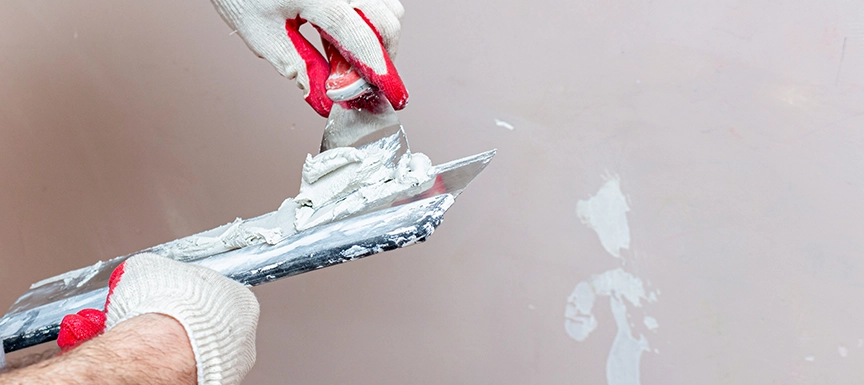
- Clean the crack thoroughly using a rag to remove any loose debris, dirt, or old caulk. This will promote better adhesion.
- Use a cold chisel and hammer to widen hairline cracks to 1/8 gently". This allows the filler to better "grip" the crack edges.
- Apply painter's tape on either side for a cleaner finished edge.
- Insert the applicator nozzle or open the container and follow on-package instructions to prepare your crack filler.
- Apply filler into the crack using a putty knife, trowel or caulking gun. Overfill slightly.
- Spread it evenly using the putty knife or trowel continuously, working it deep into the crack.
- Allow to fully dry as directed, then carefully shave off excess using a flexible putty knife at a 45° angle, leaving a slightly recessed filler.
- Smooth any remaining rough edges until you have a clean, inconspicuous finish. Wipe away any residue. Naturally, Nerolac Perma Crack Filler is highly effective for the job filling and sealing both internal and external plaster cracks.
Choosing the Right Filler for Wall Crack
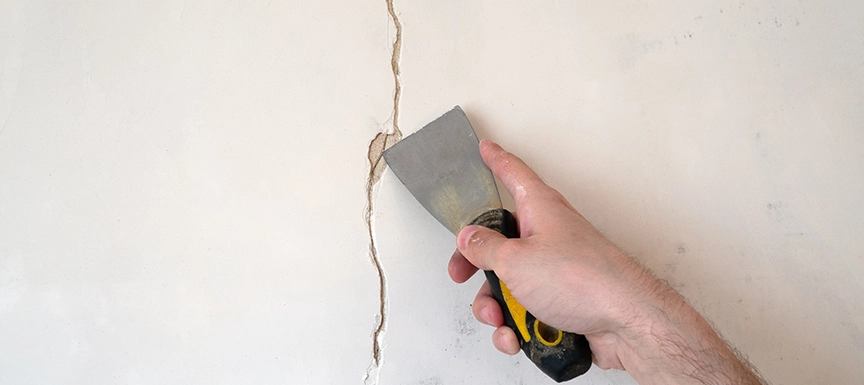
With so many crack filler options, selecting one designed for your specific material and crack size is important. Here are the points you need to follow:
- For hairline drywall/plaster cracks, latex-based fillers provide flexibility and durability against further movement.
- Acrylic-latex sealants adhere well to most porous surfaces, such as drywall and wood, and expand/contract with material shifts.
- Floor or foundation cracks require stronger mineral or epoxy fillers to withstand traffic and weather/moisture.
- Larger cracks may require expanding foam-type fillers like polyurethane that bond securely and form a tight seal in wide gaps.
- Concrete cracks need cement-like formulations to match the material's porosity and withstand alkaline conditions.
- Foaming polyurethane crack fillers have risen in popularity thanks to their unique ability to self-level and expand up to 3 times their initial volume within cracks. This makes them ideal for filling irregular voids where traditional caulk may fail.
Specialised Crack Fillers for Concrete
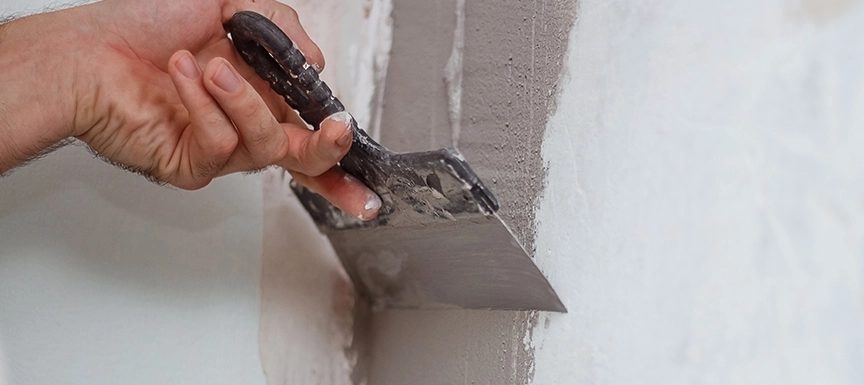
Concrete poses unique sealing challenges due to its porous composition and tendency to develop cracks from settling and shifting over time. Ordinary fillers may not bond or hold up against concrete's alkaline properties. Here are some pro tips:
- Use epoxy-type concrete crack fillers fortified with polymers and grit for strength and flexibility against expansion/contraction.
- Go for fast-curing, one-part formulas that don’t require extensive prep work or skill to apply.
- Apply on a dry, clean surface protected from rain for at least 24 hours. Moisture inhibits bonding.
- Overfill the crack, then grind/sand flush once cured to prevent water infiltration underneath.
- Check sealed areas yearly for cracking and reapply filler as needed to maintain moisture barriers.
Also Raed: Cracked Wall? No Problem! Expert Tips for Repairing and Restoring Your Home's
Expert Tips for a Professional Finish
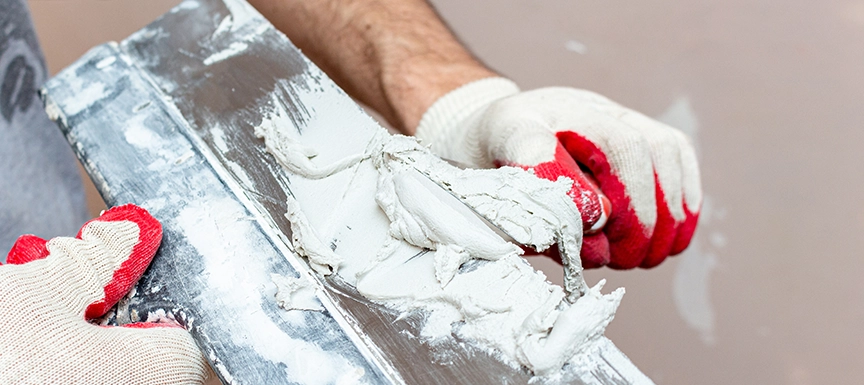
With some practice, you’ll be filling cracks like a seasoned contractor:
- Work in sections; don't apply filler too far before tooling/smoothing.
- Push the filler deep into the crack, then tool it flush to create an invisible “patch.”
- Avoid overworking dried filler, which could fracture it or leave imperfections.
- Remove any residue before it dries to achieve a seamless, natural-looking repair.
- Monitor filled cracks and reapply new layers as the structure settles over the years.
- Consider professional help for foundation-level cracks to ensure waterproofing.
When to Call a Professional NxtGen Waterproofing Services
While small cracks can often be filled at home, it’s wise to contact a structural engineer if cracks indicate serious foundation defects. Larger foundation cracks, plumbing issues, or moisture infiltration may require waterproofing membrane installation for a permanent solution.
Expert help also makes sense for large commercial or industrial structures where safety is a concern. However, you can successfully seal minor cracks with homework and careful application.
The Bottom Line
Sealing cracks around your home is an achievable DIY project armed with the right tools, materials, and know-how. Identifying crack causes, selecting compatible fillers, and applying them smoothly ensures long-lasting, professional results. With some practice, you’ll tackle cosmetic cracks like the pros in no time.
Nerolac has been providing innovative DIY and professional-grade crack-filling and waterproofing solutions. To learn more about Nerolac's range of products tailored for different surfaces like walls, floors and concrete, visit nerolac.com or speak to your nearest Nerolac representative.
Key Takeaways
- Clean and widen cracks before filling so sealant bonds firmly.
- Use flexible acrylic crack fillers for hairline and moving cracks.
- Wider cracks need mesh tape and mortar for a stronger repair.
- Sand repaired areas flush with the wall for invisible results.
- Prime repaired patches before painting to avoid dull spots.
- Consult an expert for widening or diagonal structural cracks.
Nerolac Paints, a leading paint company in India offers a wide range of wall paint colours & painting services & solutions for homes & offices.
-

Best Colour Combination For Walls To Elevate Your Home Interiors Best Colour Combination For Walls To Elevate Your Home Interiors
Intoduction:In 2025, harmonious colour schemes for individuality and…
-

What Colours Match with Blue? 14 Colour Combinations with Blue for Your Home What Colours Match with Blue? 14 Colour Combinations with Blue for Your Home
Blue is a universally popular colour for décor and design; choosing a colour…
-
What Are The Different Types Of Paint For Home And Interior Walls? What Are The Different Types Of Paint For Home And Interior Walls?
Introduction:When it comes to home decor, nothing transforms a room as…
-
Recent Blogs
- Wooden House Design: 8 Kashmiri-Inspired Ideas for Warm and Elegant Homes
- Kashmiri Home Interior Design: 5 Ideas to Bring Kashmir's Beauty Into Your Home
- 7 Beautiful Kashmiri Home Design Ideas Inspired by Noor-e-Kashmir
- Cloud Dancer Colour of the Year – Meaning, Combinations, Interior Ideas and Trends
- How To Make Yellow Colour: Tips for Perfect Wall Paint Shades & Home Décor Ideas
-
Get in Touch
Looking for something else? Drop your query and we will contact you.
FAQs
What is the step by step guide to seal cracks in walls?
First, scrape loose paint and plaster around the crack. Second, widen it slightly into a V-shape to improve filler grip. Third, remove dust and lightly dampen the area. Fourth, press in a crack filler or sealant with a putty knife, overfilling slightly. Fifth, let it dry, sand smooth, prime and paint. Check after a few weeks for reappearance.
What is the wall crack sealant process step by step?
Identify the crack type and choose an appropriate sealant, such as elastomeric for moving cracks. Clean the crack thoroughly and ensure it is dry. Apply primer if recommended by the sealant maker. Using a caulking gun or knife, apply sealant into the crack evenly. Smooth the surface with a wet tool, let it cure, then paint over it.
How do I seal wall cracks before painting?
Inspect all walls under side lighting to spot hairline cracks. Fill them with acrylic crack filler and let dry. Apply wall putty over the area if the surface is uneven, then sand smooth. Prime the entire wall or at least the repaired patches. This ensures uniform paint absorption so repaired areas do not show through the final coats.
What mistakes should I avoid when trying to fill cracks in walls?
Avoid filling cracks without cleaning dust and loose material, which weakens adhesion. Using rigid fillers for moving cracks causes them to reappear. Filling damp cracks traps moisture. Painting before the filler cures fully leads to shrinkage marks. Ignoring the underlying cause, such as seepage or settlement, means cracks will keep returning.
What factors affect the cost of crack filler for walls?
Cost depends on the type of filler, such as acrylic, polymer, elastomeric or cement-based mortar, and the quantity required. The number and width of cracks affect material use. Labour for widening, meshing and repainting adds to expense. Exterior cracks needing scaffolding and waterproofing cost more than interior touch-ups. Getting a professional assessment helps estimate accurately.
How do I know if a wall crack needs professional help?
Cracks wider than a few millimetres, diagonal cracks near doors and windows, or cracks that keep growing may indicate structural movement. Cracks with doors or windows jamming nearby are warning signs. Stepped cracks in brickwork and cracks accompanied by dampness need attention. In these cases, consult a structural engineer before sealing and painting.


Get in Touch
Looking for something else? Drop your query and we will contact you.
Latest Happenings in the Paint World
Get some inspiration from these trending articles





Popular Post
Popular Searches
What’s Trending in Bedrooms
Explore Trending Living Room Ideas
- Living Room Colour Combination
- Modern Two Colour Combination for Living Room
- Wall Texture for Living Room
- Vastu Colours for Living Room
- Wall Texture Design for Living Room
- Living Room Paint Ideas
- Living Room Design Ideas
- Paint Colour Ideas for Living Room
- Living Room TV Wall Designs
- Green Living Room Walls
Kitchen Ideas People Love
Explore Trending Ceiling Ideas
Study Room Ideas in Demand
Explore Wall Paint Categories
Handpicked Colour Inspirations
- Accent Wall Design
- Bedroom Design Ideas
- Exterior Wall Colour Design Ideas
- Interior Wall Colour Design Ideas
- Kitchen Design Ideas
- Living Room Interior Design
- Geometric Wall Design Ideas
- Home Colour Combination Ideas
- Home Décor Ideas
- Mural Wall Paint Design Ideas
- Office Space Design Ideas
- Puja Room Design Ideas
- Texture Design Ideas
- Festival Painting Ideas
- Paint Colour Chart
- Wall Painting Designs
- Wood Wall Décor Ideas
- Mural Wall Paint Design
- Hall Design Ideas
- Gate Colour Design
- Exterior Wall Colour Design
- Door Colour Design Ideas
-
 Get in Touch
-
Store Locator
-
 Download App
×
Get in Touch
Looking for something else? Drop your query and we will contact you.

