

Bathroom Waterproofing: Best Methods, Chemicals & Expert Tips
Published: 30 Jun 2022 | Modified: 19 Aug 2026
Quick Summary
Effective bathroom waterproofing helps prevent water from seeping through floors, walls, joints, and plumbing points. A complete system can include liquid waterproofing membranes, polymer-modified materials, waterproof bathroom flooring solutions, sealants, anti-damp coatings, and proper drainage slopes. The right approach depends on the condition of the surface, the wet zones, and the level of water exposure. Regular inspection of grout, sealants, drains, and damp areas can also help maintain long-term protection.
Create Your Dream Home With Our Painting Experts
Fill the form below to book a free site evaluation by Nerolac Nxtgen painting Services expert
TABLE OF CONTENTS
Why Bathroom Waterproofing Is Essential for Every Home?
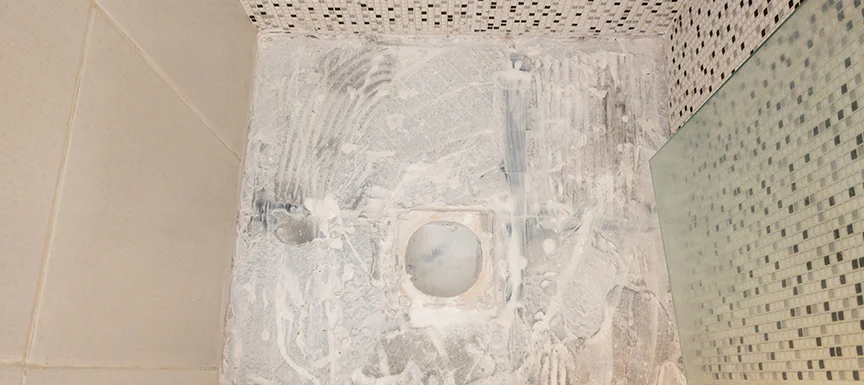
Water that escapes through tile joints or pipe cut-outs travels into plaster and concrete. Over time, you see paint peeling, swollen skirting, discoloured grout, and even a damp patch on the room below.
Proper bathroom water proofing stops seepage at the source, extends tile life, and limits expensive repairs later. It also helps control mould and musty odour, which improves indoor air quality for your family.
How Does Waterproofing for Bathroom Prevent Leaks and Structural Damage?
A good system does three jobs:
1. Seals the substrate with a continuous film, so water cannot find a path.
2. Bridges small cracks caused by heat and routine movement.
3. Protects weak points such as floor traps, pipe collars, and wall–floor junctions.
Liquids that form elastic membranes, SBR or polymer additives in screed, and durable sealants at edges together create a water-tight envelope under your tiles and along painted walls. Nerolac’s Perma Waterproof Latex and Perma Waterproof Polymer are purpose-built for bonding, crack repair, and wet-area protection.
Can Waterproofing Chemicals Protect Bathroom Walls and Floors from Moisture?
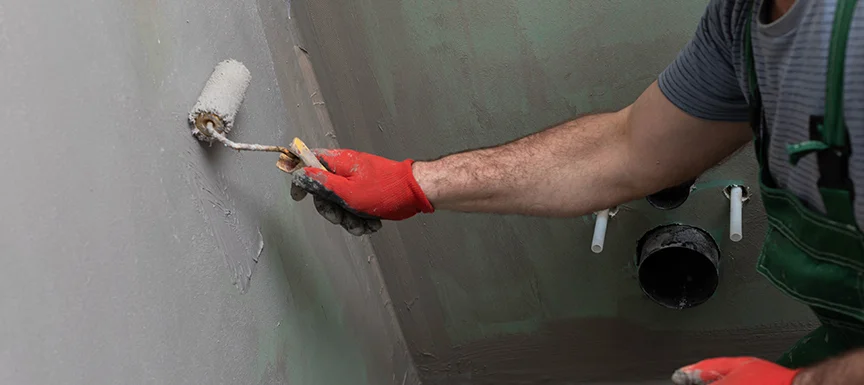
Yes. The right chemistry creates a barrier beneath tiles and a moisture-resistant base coat on upper walls. For interior surfaces above tile height, Perma Damp Protect Interior serves as an anti-damp undercoat before you apply your final paint. Under the floor and wall tiles, use a liquid membrane or polymer-modified screed to block seepage.
What Are the Benefits of Using Modern Bathroom Waterproofing Solutions?
- Lower repair costs: Fix leaks once, not every monsoon.
- Cleaner finish: Helps prevent black spots, efflorescence, and loose tiles.
- Healthier space: Reduces mould and damp odour.
- Better tile grip: Polymer additives improve bonding for bathroom tiling and waterproofing in one workflow.
Also Read: What Is Nerolac NXTGen Waterproofing Services?
Best 10+ Bathroom Waterproofing Solutions and Ideas
Start with prep. Clean the base, remove loose plaster, check the slope to the drain, and mark wet zones clearly. Good preparation makes any bathroom waterproofing system last longer.
Liquid Waterproofing Membrane: Easy and Effective Barrier
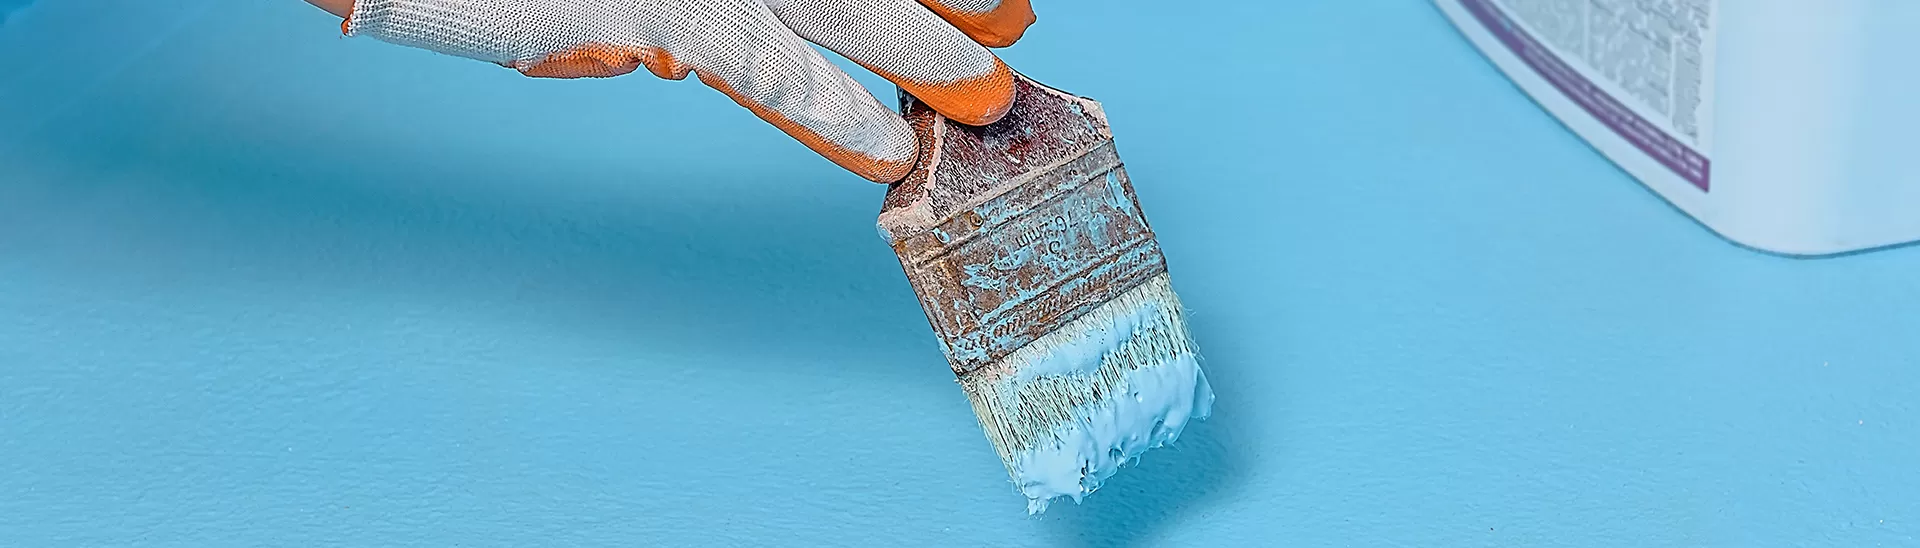
A liquid membrane rolls or brushes on like paint and cures to form a seamless sheet under tiles. It covers corners, around the drain, and small cracks better than cement slurry alone. Use two coats for the right coverage and add a reinforcing fabric at the wall–floor joints for extra safety. This is the backbone of toilet waterproofing in most modern homes.
Waterproof Wall Panels: Stylish and Durable Protection
Water proof wall panels add a hard surface that resists splash and soap scum on dry-zone walls or behind the vanity. They do not replace under-tile waterproofing in shower zones, but they reduce repaint cycles and keep water resistant bathroom walls looking new. Seal panel edges with a compatible silicone to stop capillary seepage.
Waterproof Bathroom Floor Tiles: Prevent Moisture Damage
Waterproof bathroom floor tiles are only as good as the base and the grout. Use a liquid membrane or polymer-rich screed beneath them, then grout with a high-quality system. Slope must guide water to the trap; even a slight depression can hold water and push it into joints over time. This is a key step in bathroom tile waterproofing.
Epoxy-Based Waterproofing for Bathroom Flooring
Epoxy mortars and epoxy grout bring strong chemical resistance and low porosity. They are helpful in shower cubicles and near the WC where standing water is common. Epoxy needs careful mixing and swift application, but once cured, it resists stains better than ordinary cement grout. Consider it when you want very low-maintenance waterproof bathroom flooring.
Also Read: Types of Waterproofing: Methods & Solutions
Hybrid Waterproofing Solutions: Maximum Protection for Walls and Floors
A hybrid stack combines: polymer-modified repair, liquid membrane on the floor and lower walls, and an interior anti-damp system above tile height. This blend gives belt-and-braces protection in Indian bathrooms that face daily cleaning, steam, and hard water.
Waterproof Paint for Bathroom Walls: Long-Lasting Moisture Defence
On walls above tile height and on ceilings, an anti-damp undercoat such as Perma Damp Protect Interior prepares a stable base for your topcoat. It helps resist peeling and bubbling that show up when steam condenses after a hot shower.
Silicone Sealants and Caulking: Prevent Leaks at Joints and Fixtures
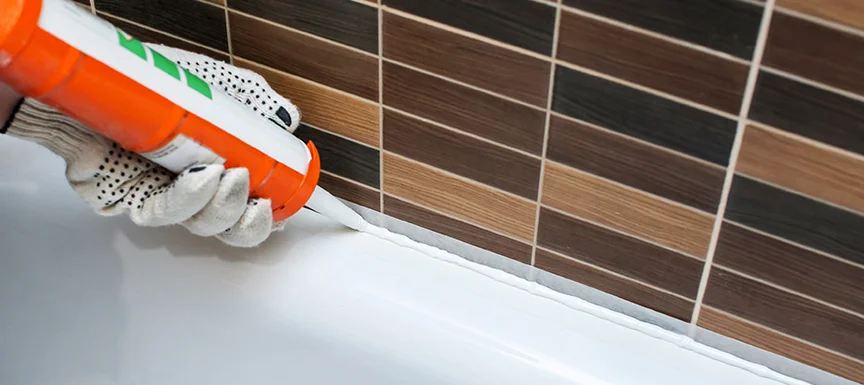
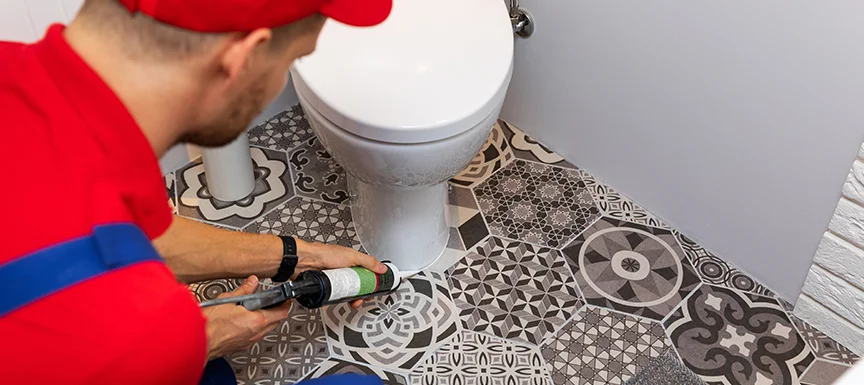
Use a sanitary-grade silicone around the counter basin, along glass partition tracks, and at the base of the WC. This simple bathroom sealing step stops water from slipping behind fixtures and starting hidden damp patches. Replace the bead if it cracks or turns black.
Waterproof Sheeting for Bathrooms: Extra Layer Against Dampness
Self-adhesive or sheet membranes on the floor and lower wall can give added security in high-use bathrooms or where the slab has slight movement. Overlap joints properly and press them down with a roller. Many pros still apply a thin liquid coat over laps for belt-and-braces protection, an effective way to use waterproof sheeting for bathrooms along with a liquid.
Also Read: Best Roof Waterproofing Methods, Materials & Tips
Polyurethane and Acrylic Coatings: Modern Waterproofing Options
PU membranes bring excellent elasticity and crack-bridging. Acrylic systems are easier to apply and are great for quick upgrades. In a typical Indian flat, PU for the shower pan and acrylic for skirting and splash zones is a balanced, modern mix.
Combination of Membrane and Chemical Treatments for Full Protection
On old bases or when you are re-tiling, combine a liquid membrane with polymer-modified screed and finish with an anti-damp interior undercoat above tile height. You get full-room protection—floor, walls, and ceiling. Nerolac’s Perma Waterproof Polymer helps in repair mortar and tile bonding, while Perma Waterproof Latex supports bonding and crack repair in wet zones.
How to Choose the Right Bathroom Waterproofing Solution for Your Space
Think through three points before you start:
1. Zone mapping: Identify wet zones (shower, near drain, around WC) versus splash zones. Wet zones need a membrane; splash zones can use polymer-rich coats and an interior anti-damp system.
2. Base condition: Old cracks, loose plaster, or hollow-sounding tiles call for repair first. Use a bonding agent or polymer-modified repair mortar where needed.
3. Use and upkeep: A family bathroom sees more water and needs stronger details than a guest bath. Choose a system that you can maintain easily.
For many homes, the safest path is a hybrid: liquid membrane on the floor and lower walls, polymer-modified screed, tight sealing around fixtures, and Damp Protect Interior above tile height.
Also Read: How To Find the Best Waterproofing Contractors?
Which Waterproofing Method Works Best for Tiles, Walls, and Flooring?
- Under tiles (floor and lower wall): Liquid membrane with fabric at joints, followed by screed or tile adhesive. Add epoxy grout in shower zones if you prefer very low upkeep.
- Walls above tile height: Anti-damp interior undercoat, then your topcoat. Perma Damp Protect Interior is designed as a base layer for interiors.
- Around fixtures and glass: Sanitary silicone for a clean seal.
- Old slabs: Add polymer to repair mortar using Perma Waterproof Polymer to improve bond and reduce future cracks.
How to Apply Bathroom Waterproofing Step by Step
Here are the steps to apply bathroom waterproofing easily:
1. Inspect and mark levels – Decide finished tile level and drain heights.
2. Clean the base – Remove dust and weak plaster; the surface should be sound and slightly rough.
3. Repair and fill – Open cracks and fill with polymer-modified mortar. Prime porous spots if the datasheet asks for it.
4. Apply liquid membrane – Two coats at the recommended coverage. Reinforce at corners, around the trap, and along pipe collars.
5. Build screed – Use a light polymer dose in the screed for better bond and lower porosity. Maintain slope to the drain.
6. Tile and grout – Fix tiles, then grout. Consider epoxy grout in shower areas for stain resistance.
7. Seal edges – Run a neat bead of sanitary silicone at glass tracks, vanity edges, and the WC base.
8. Protect walls and ceiling – On upper walls, apply Damp Protect Interior as the base before your final paint.
Also Read: 5 Steps Guide To Completely Waterproof Your Home
How to Maintain a Bathroom Waterproofing System for Years of Protection
- Daily care: Keep the drain cap clean; pooled water stresses grout lines.
- Monthly check: Look at the silicone beads near the basin and the glass track. If a gap shows, re-seal the section.
- Seasonal reset: Deep clean grout lines, inspect for hairline cracks, and touch up the ceiling with an anti-damp base if needed.
- Ventilation: Use the exhaust fan after hot showers to reduce condensation on waterproofing bathroom walls.
Also Read: Foundation Waterproofing to Protect Your Home from Leakage
Key Takeaways
- Bathroom waterproofing helps protect floors, walls, joints, and fixtures from moisture and seepage.
- Liquid waterproofing membranes can create a continuous protective barrier beneath tiles.
- Waterproof bathroom floors need proper drainage slopes, suitable membranes, quality grout, and sealed joints.
- Waterproofing bathroom walls above tiled areas can include an anti-damp undercoat before the final paint.
- Silicone sealants around basins, WC bases, glass partitions, and other fixtures help prevent water from entering vulnerable joints.
- Regularly checking drains, grout, silicone seals, cracks, and damp patches helps maintain bathroom waterproofing over time.
Nerolac Paints, a leading paint company in India offers a wide range of wall paint colours & painting services & solutions for homes & offices.
-
Best Colour Combination For Walls To Elevate Your Home Interiors Best Colour Combination For Walls To Elevate Your Home Interiors
Intoduction:In 2025, harmonious colour schemes for individuality and…
-
Best Green Colour Combinations for Walls – Schemes & Design Ideas Best Green Colour Combinations for Walls – Schemes & Design Ideas
Introduction:Green has long been a favourite choice in home decor…
-

What Colours Match with Blue? 14 Colour Combinations with Blue for Your Home What Colours Match with Blue? 14 Colour Combinations with Blue for Your Home
Blue is a universally popular colour for décor and design; choosing a colour…
-
Recent Blogs
- Wooden House Design: 8 Kashmiri-Inspired Ideas for Warm and Elegant Homes
- Kashmiri Home Interior Design: 5 Ideas to Bring Kashmir's Beauty Into Your Home
- 7 Beautiful Kashmiri Home Design Ideas Inspired by Noor-e-Kashmir
- Cloud Dancer Colour of the Year – Meaning, Combinations, Interior Ideas and Trends
- How To Make Yellow Colour: Tips for Perfect Wall Paint Shades & Home Décor Ideas
-
Get in Touch
Looking for something else? Drop your query and we will contact you.
FAQs
Why is bathroom waterproofing important?
Bathroom waterproofing helps stop water from travelling through tile joints, pipe openings, wall-floor connections, and other vulnerable areas. It can help reduce problems such as damp patches, peeling paint, loose tiles, mould, and musty odours.
How can I waterproof my bathroom floor?
Start by preparing and repairing the surface, then apply a suitable liquid waterproofing membrane and reinforce vulnerable areas such as corners, drains, and pipe collars. After that, create the correct slope towards the drain before installing tiles and grout.
What is the best way to waterproof bathroom walls?
For areas beneath tiles, a suitable waterproofing membrane can provide a protective barrier. On walls above the tiled area, an anti-damp undercoat followed by the appropriate topcoat can help protect the surface from moisture and condensation.
Can waterproofing chemicals be used for bathroom walls and floors?
Yes. Different waterproofing materials can be used depending on the application. Liquid membranes, polymer-based products, sealants, and anti-damp coatings can form part of a waterproofing system for different areas of the bathroom.
How do I prevent water from leaking around bathroom fixtures?
Pay particular attention to joints around the basin, WC, glass partitions, pipe openings, and other fixtures. A suitable sanitary silicone sealant can help close these gaps and prevent water from getting behind fixtures.
How can I maintain my bathroom waterproofing for longer?
Keep drains clear, avoid leaving standing water on the floor, inspect grout and silicone seals regularly, and look for early signs of cracks or dampness. Good ventilation after hot showers can also help reduce condensation and moisture buildup.


Get in Touch
Looking for something else? Drop your query and we will contact you.
Latest Happenings in the Paint World
Get some inspiration from these trending articles



Popular Post
Popular Searches
What’s Trending in Bedrooms
Explore Trending Living Room Ideas
- Living Room Colour Combination
- Modern Two Colour Combination for Living Room
- Wall Texture for Living Room
- Vastu Colours for Living Room
- Wall Texture Design for Living Room
- Living Room Paint Ideas
- Living Room Design Ideas
- Paint Colour Ideas for Living Room
- Living Room TV Wall Designs
- Green Living Room Walls
Kitchen Ideas People Love
Explore Trending Ceiling Ideas
Study Room Ideas in Demand
Explore Wall Paint Categories
Handpicked Colour Inspirations
- Accent Wall Design
- Bedroom Design Ideas
- Exterior Wall Colour Design Ideas
- Interior Wall Colour Design Ideas
- Kitchen Design Ideas
- Living Room Interior Design
- Geometric Wall Design Ideas
- Home Colour Combination Ideas
- Home Décor Ideas
- Mural Wall Paint Design Ideas
- Office Space Design Ideas
- Puja Room Design Ideas
- Texture Design Ideas
- Festival Painting Ideas
- Paint Colour Chart
- Wall Painting Designs
- Wood Wall Décor Ideas
- Mural Wall Paint Design
- Hall Design Ideas
- Gate Colour Design
- Exterior Wall Colour Design
- Door Colour Design Ideas
-
 Get in Touch
 -
Store Locator
-
 Download App
×
Get in Touch
Looking for something else? Drop your query and we will contact you.

